Long time since my last post, but I am still here and slowly still building tanks 🙂
As has been previously stated I like Churchills. In addition to the MkVI’s I have in my Flames of War army, I also wanted to have some Crocodiles flamethrowers.
Looking around, I saw that this would be a bit of a problem as no company seemed to do a reasonable 1:72 Crocodile model (or conversion kit) at a reasonable price (as I would need three of them). The closest I could find was the Airfix 1:76 kit, but having got an Airfix (supposedly) 1:72 MkVII I knew that the scale on the main tank body was completely off even for 1:76 and that it would look tiny compared to the Plastic Soldier Company MkVI Churchills. Also some of the elements of the Airifx kit are just a bit *nasty* such as the main gun.
Initially I thought I could just stick the fuel trailer on the back of a PSC Churchill and be done with it, but then I remembered that all Crocodiles were MkVII tanks and so the side hatches, turret, front plate with the drivers hatch etc were all different and so it wouldn’t look right. However, looking through my bits box I did have a partially built Airfix MkVII and an Airfix Crocodile trailer so I thought why not use the appropriate pieces from the Airfix kit to convert one of my unbuilt PSC kits into a crocodile?
Looking at the primary differences between the kits and the MkVI/MkVII tanks it would involve:
- Swapping the PSC cast MkVI turret for the Airfix cast/welded MkVII and adapting it to fit the PSC hull.
- Fixing the various inaccuracies or bad moulding in the Airfix turret e.g. rear stowage, gun, lack of bevel, sighting vane etc
- Removing the angular side hatches on the PSC side plates and replacing them with the Airfix circular hatches.
- Adapting the Airfix front plate (with driver hatch and MG) to fit the PSC hull
- Replacing the integral PSC exhaust system with the separate Airfix exhaust
- Adapting the Crocodile trailer to fit the PSC hull (hoping there wasn’t too much variation)
- General detailing and tweaking of the tank overall.
So with the above in mind I sat down one day to mush a PSC Churchill, an Airfix Crocodile and my bits box all together to hopefully get something decent out of it at the end.
The assorted references for this build include:
George Bradford’s excellent book “British Armoured Fighting Vehicles”
The Osprey/New Vanguard book “Churchill Crocodile Flamethrower”
The Osprey modelling book “Modelling the Churchill Tank”
Lloyd’s awesome website covering detailing a MkVII Churchill.
The kits
A fairly easy and obvious starting point but there are differences between the PSC and Airfix kits.
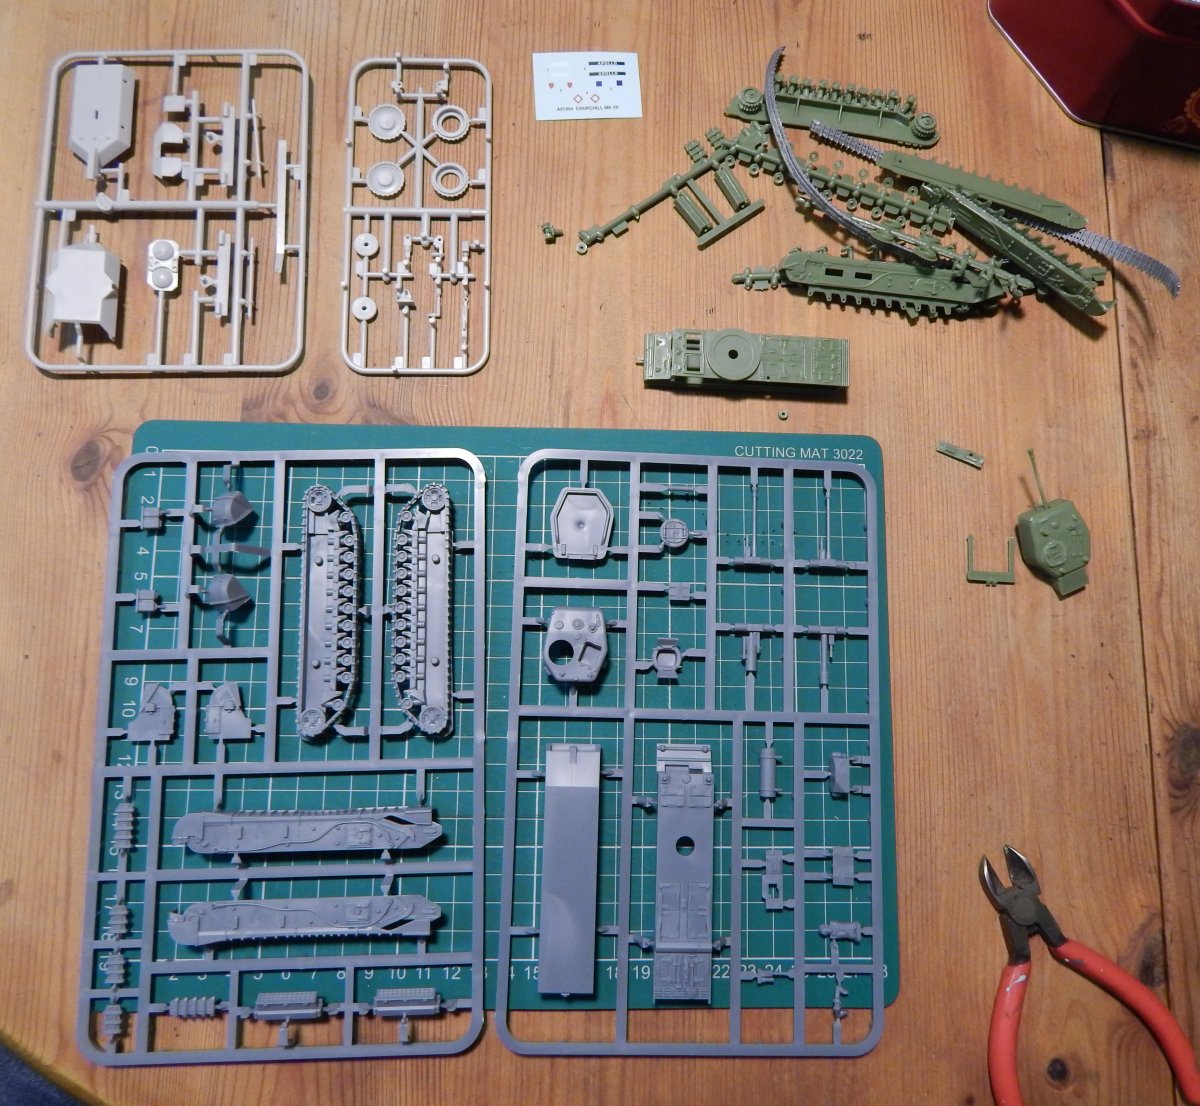
The most notable and immediate difference is that the PSC tracks and running gear are all a single piece – no spending three days assembling bogies. Beyond that, most difference are in the detail; the Airfix kit tends to have more separate hatches, exhaust etc than the PSC. However, I prefer the PSC turret construction and gun options.
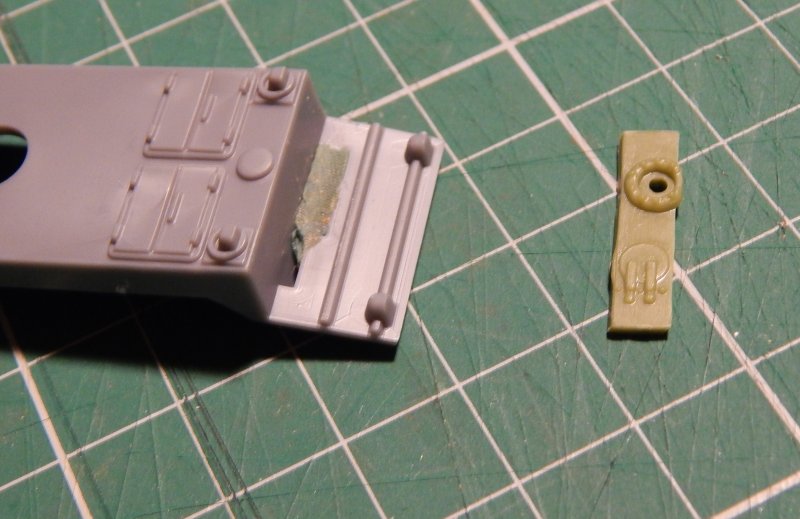
The hull
The first and easiest section to modify and assemble was the hull. This was basically the standard PSC hull but with the Airfix MkVII driver hatch panel in place of the PSC MkVI one. The PSC hull has a small recess for part of the panel to fit into that isn’t present on the Airfix version, so it was filled with modelling putty to bring it flush with the surface. The panel is slightly lower than the PSC one so a strip of plastic cut from a spare piece of kit and some putty so fixed that.
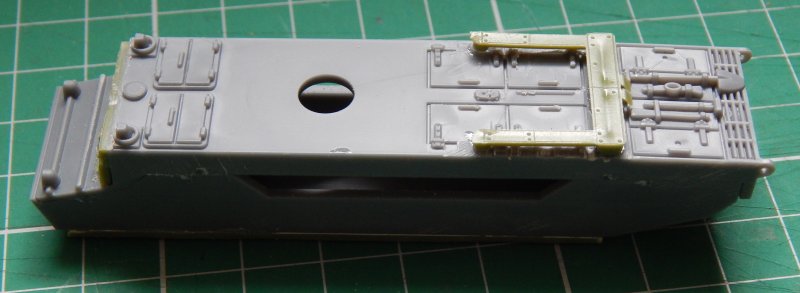
The underside of the PSC hull lacking in detail so I cut down the Airfix underside, sanded it thin and then glued it to the base of the PSC hull. The shortened ends were blended in with putty.
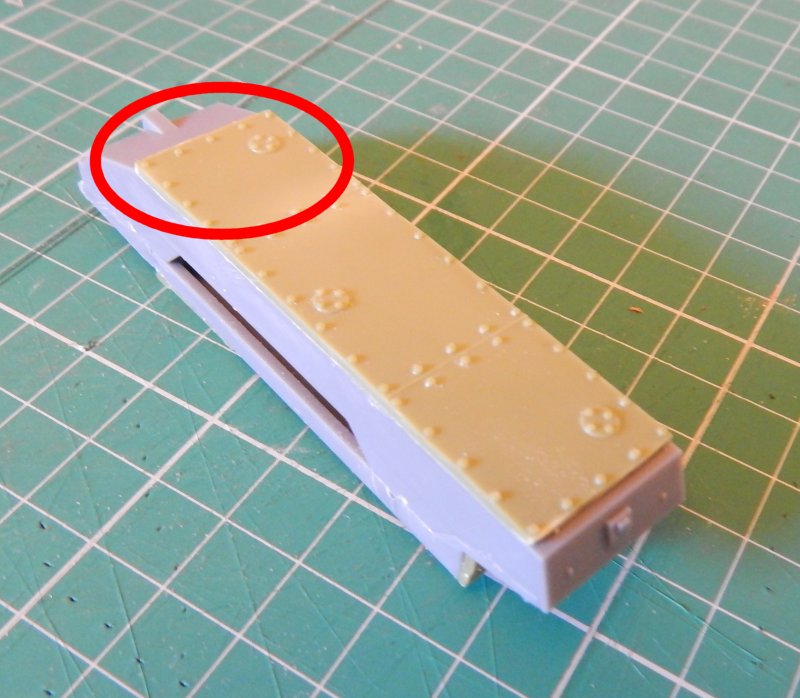
The putty is not in this image, but it was added to blend in the small lip at the front and to create a shallower angle at the back (circled red). It took quite a lot at the rear, but made an almost seamless joint.
The last major alteration to the hull was the removal of the integral exhaust and the addition of the separate Airfix exhaust.
Additional detail is to be added, but later in the build.
Tracks and guards
The tracks were good enough out of the box, but the guards were distinctly not suitable for a MkVII.
Out came the knife and off came the square hatches from the PSC guards. After clipping the round hatches from the Airfix guards, round them off and popped them into place on the PSC guards.
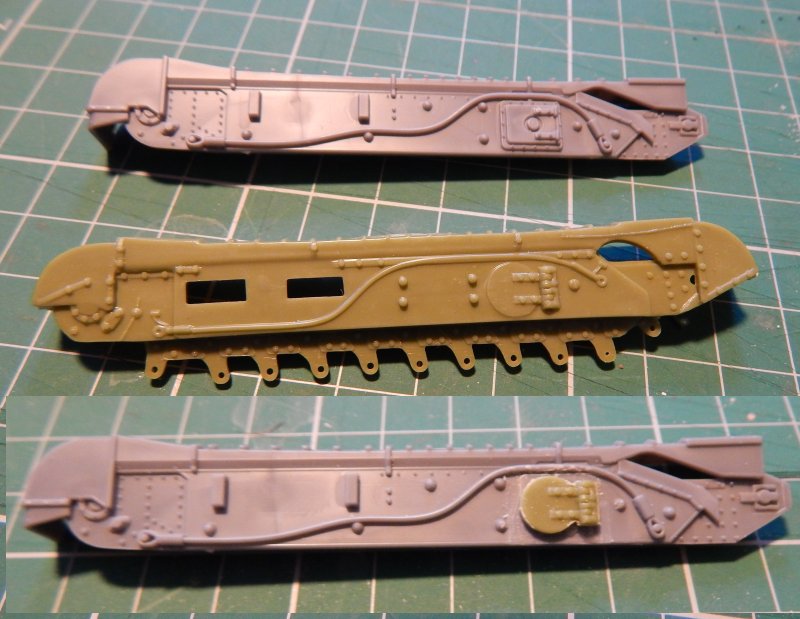
The original PSC guard is at the top, middle is the Airfix guard and bottom is the modified PSC guard.
After trying to fit some spare tracks as appliqué armour, I noticed that the PSC guards had the tow cable in the wrong place to fit the tracks. Looking through my bits box I had some suitable diameter wire so I removed the relief plastic cable and replaced it with proper twisted wire in the correct place to then fit spare track links.
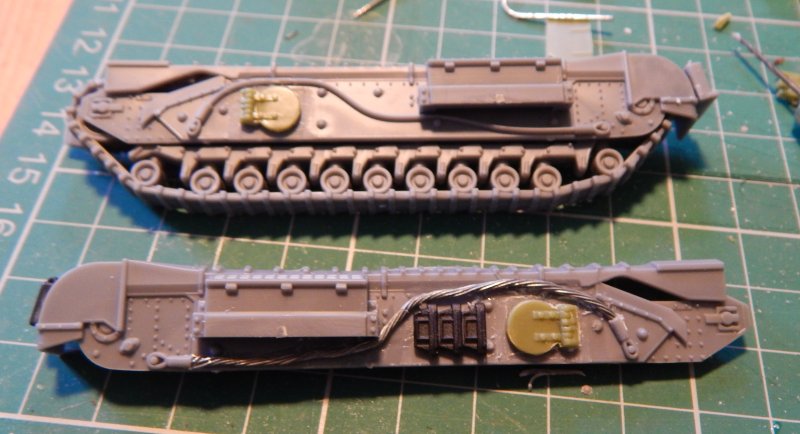
A little feature that makes the PSC guards outshine the Airfix guards is that the front of the guard is a separate piece that can be added or not as the detail underneath on the main guard is moulded. In reality, this front guard was often removed during service as it snagged, got bent etc, and if you wish to replicate this with the Airfix kit it requires cutting away the guard and then modelling the detail it covers (which is rather fiddly work at 1:72), so the fact that the PSC kit makes this little detail an option is rather nice.
The turret
The turret assembly probably required the most work to meld the PSC and Airfix components nicely. The Airfix turret has no base, only a long pin, so the first point was to remove this and check the turret would match the PSC base so that the new turret would fit the hull correctly. Thankfully, despite the Airfix hull being far too short compared to PSC, the turrets are almost identical in size so it would just take some putty and then a sand to join the two halves.
First though, the awful Airfix gun had to go – it’s thin, bendy and just nasty. The PSC gun on the other hand is straight and sturdy. However, the mountings in the turret are different so I had to cut the guns from their respective mounts and pin the PSC gun onto the Airfix mount. After snapping the mount back in and replacing the mantle, the turret suddenly looked a whole lot better.

As can be seen in the photo above, the match was very close and just needed some additional putty to close the gap.
Now that the body of the turret was suitable, I turned to the extra details – the rear stowage box was not quite right, the cupola needed changing so I could mount a commander in it, there was no sight vane or aerials on the turret and so on. The biggest issue though was a lack of bevel at the base of the turret that was characteristic of the MkVII. So out with the putty again.
At least that was what was supposed to happen. However I was trying to keep track of the changes in my head rather than writing a list to follow so I ended up totally forgetting about it until I had already nearly finished the turret, so I will return to that detail later.

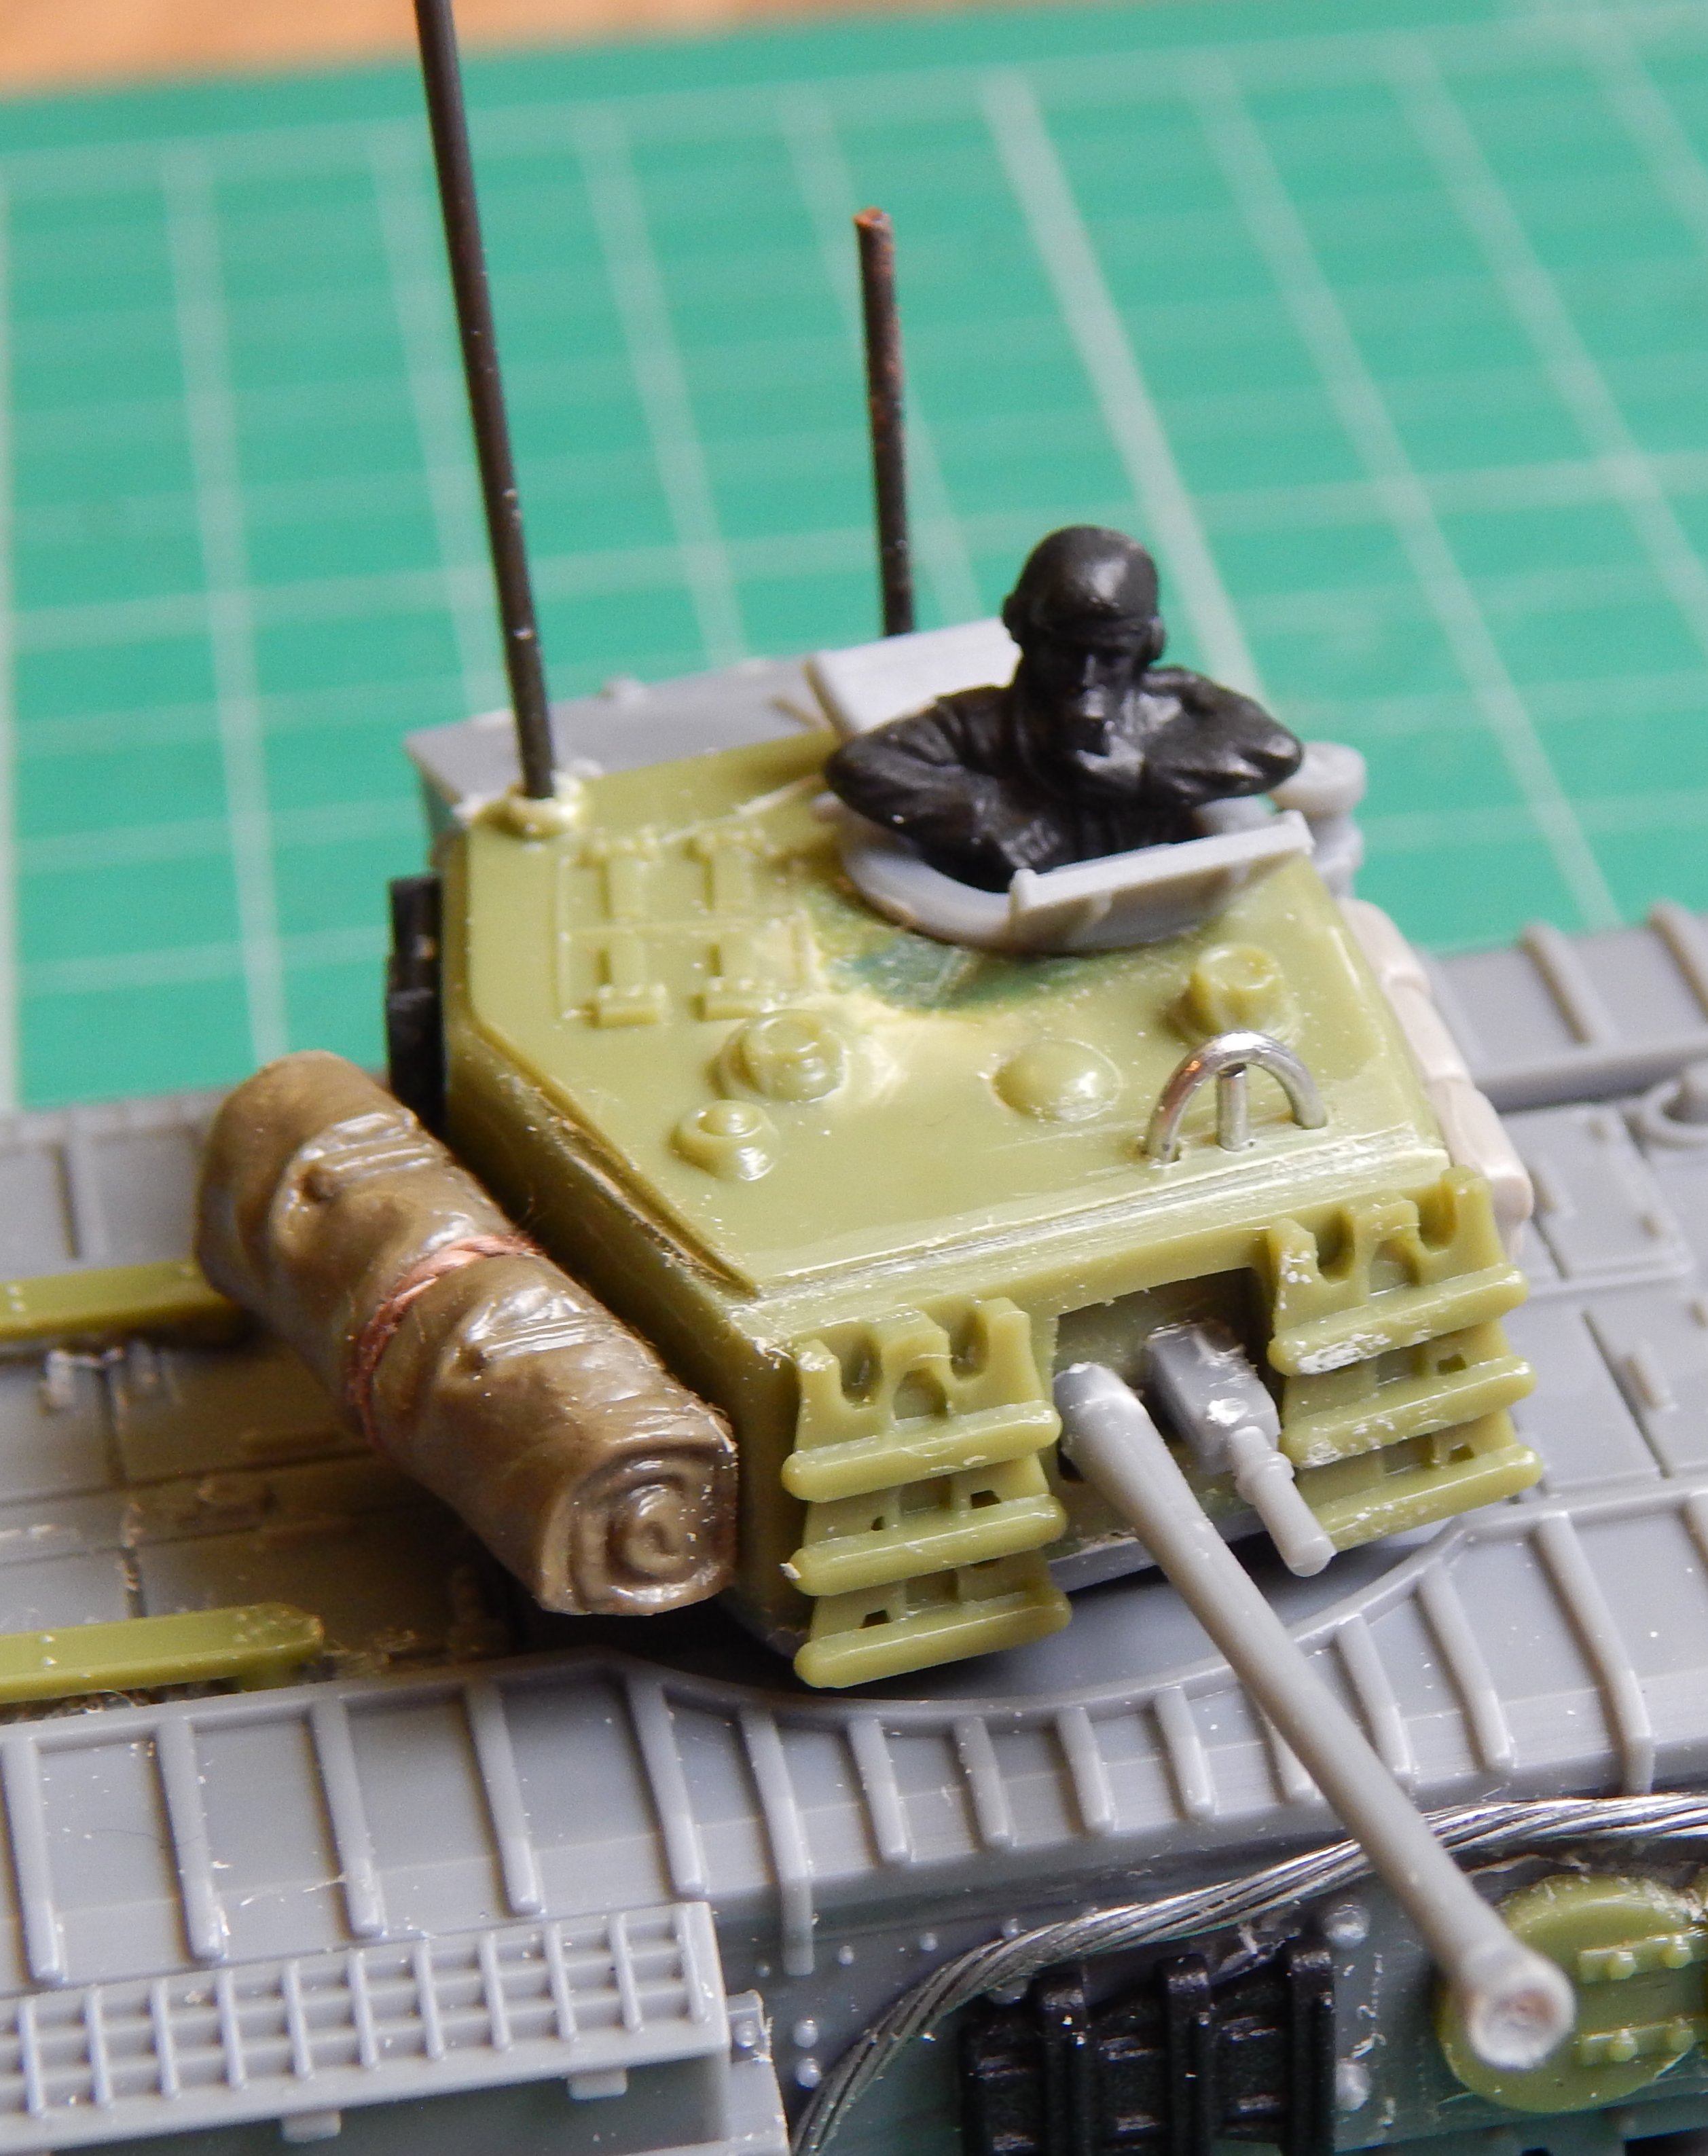
The sighting vane was made from a paper clip and aerials are piano wire. One is incorrect though and I really should have checked first, so needs to be replaced. The roll is an old piece of stowage from the bits box tied with thread, the front spare tracks are from the Airfix kit and the packs and other tracks are from various PSC kits, as is the new cupola, commander and rear stowage bin. The small patch of putty next to the commander is the result of my overzealous attempt to remove the internal pin by bending not cutting – it didn’t break but the top of the turret did – cue a quick putty repair.
So that was the bulk of the work done to convert it to a MkVII, now to finished and make it a Crocodile.
Crocodile Tank Modifications
The adaptation of the MkVII tank to a Crocodile is not very complex – the front machine gun is replaced with a flamer, the pipe runs under the tank towards the rear and there is a tow hitch attached.
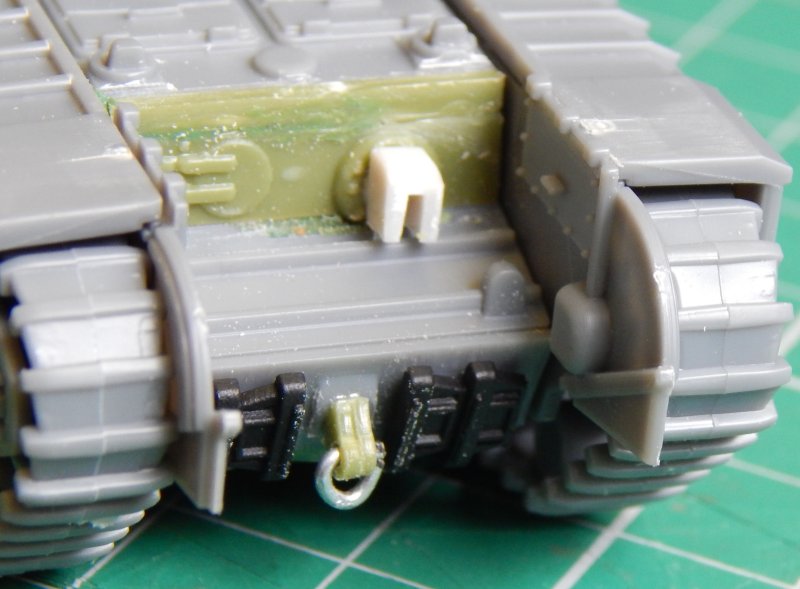
At the front end it is really simple – the only real difference is the replacing of the besa mg with the flamethrower nozzle. The Airfix flamethrower is a little on the large side though, so I cut it back slightly and re-cut the angle on the top. Above the hatch and nozzle you can see where the panel needed to be patched in with spare sprue and putty to correct the height difference between the kits. The hitch on the front is two loops cut from the rear of the Airfix guards, glued together with a bent piece of wire making the hitch. The inside part of the track guard is still projecting, but will be cut back.
Underneath I made a slight mistake – I misread the instructions and glued the fuel-line down the centre of the hull rather than offsetting it. Thankfully I noticed while the poly cement was still tacky and could move it to the correct position.
There should have been a picture here showing the altered base and rear before painting, but I somehow missed it and forgot to take a photo.
Once the Crocodile alterations were made, the only other odds and ends to do were to add some further detailing in the way of fuel cans, stowage etc to the hull of the tank and then it was time to move onto the trailer.
Dave
